Start from an existing EnergyPlus file and finish with a model that holds several alternatives, an exported epJSON file for each one, and a change made in a text editor that comes back as a new energy efficiency measure (EEM). The same steps apply to a file from another EnergyPlus tool, to files a colleague edited, and to files an AI assistant changed.
The example is 5ZoneAirCooled.idf, an EnergyPlus example input data file (IDF): five zones under a return plenum, a variable air volume (VAV) air loop, a chiller and a boiler.
What you need
- EP3 3.0 and EnergyPlus 26.2 installed. EP3 converts an IDF with the EnergyPlus installation of the version the file names, and asks you to locate the installation folder if it cannot find it.
- The example file: 5ZoneAirCooled.idf. Save it to a project folder,
C:\Projects\5Zonein the screenshots. - A text editor. Notepad is enough; Visual Studio Code also highlights epJSON syntax and numbers the lines.
- The screenshots use SI units (m, °C).
Import the IDF
- Start EP3, or choose File > New, and close the Model Wizard with Skip - detailed mode.
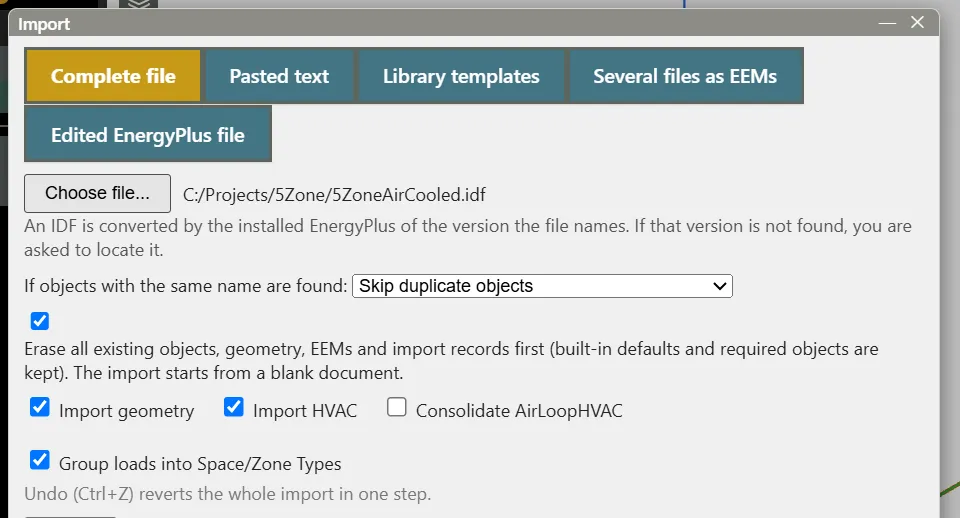
- Click Import in the top toolbar. The Import dialog opens on the Complete file tab.
- Click Choose file… and pick
5ZoneAirCooled.idf. - Leave the options at their defaults: Erase all existing objects, geometry, EEMs and import records first, Import geometry, Import HVAC and Group loads into Space/Zone Types are ticked, and Consolidate AirLoopHVAC is not.
- Click Import.
With Group loads into Space/Zone Types ticked, the Combine loads into Space and Zone Types dialog opens over the model with a first guess at Space Types and Zone Types for the imported loads. This tutorial keeps the loads as they came in.
- Click Cancel Grouping.

Tip: Grouping can be done later; the handbook chapter Internal Loads, Space Types, and Zone Types covers it.
Read the import report
The Import dialog now shows the report. The line at the top says what came in: 210 objects and 46 surfaces were created, and 23 alerts are listed to review (the line is amber because of them). Below it are the options the import ran with, a summary for each part (Objects, Geometry, Zone equipment) and a table with one row per object.
- Tick Alerts only to list the objects that did not come across as they were in the file.
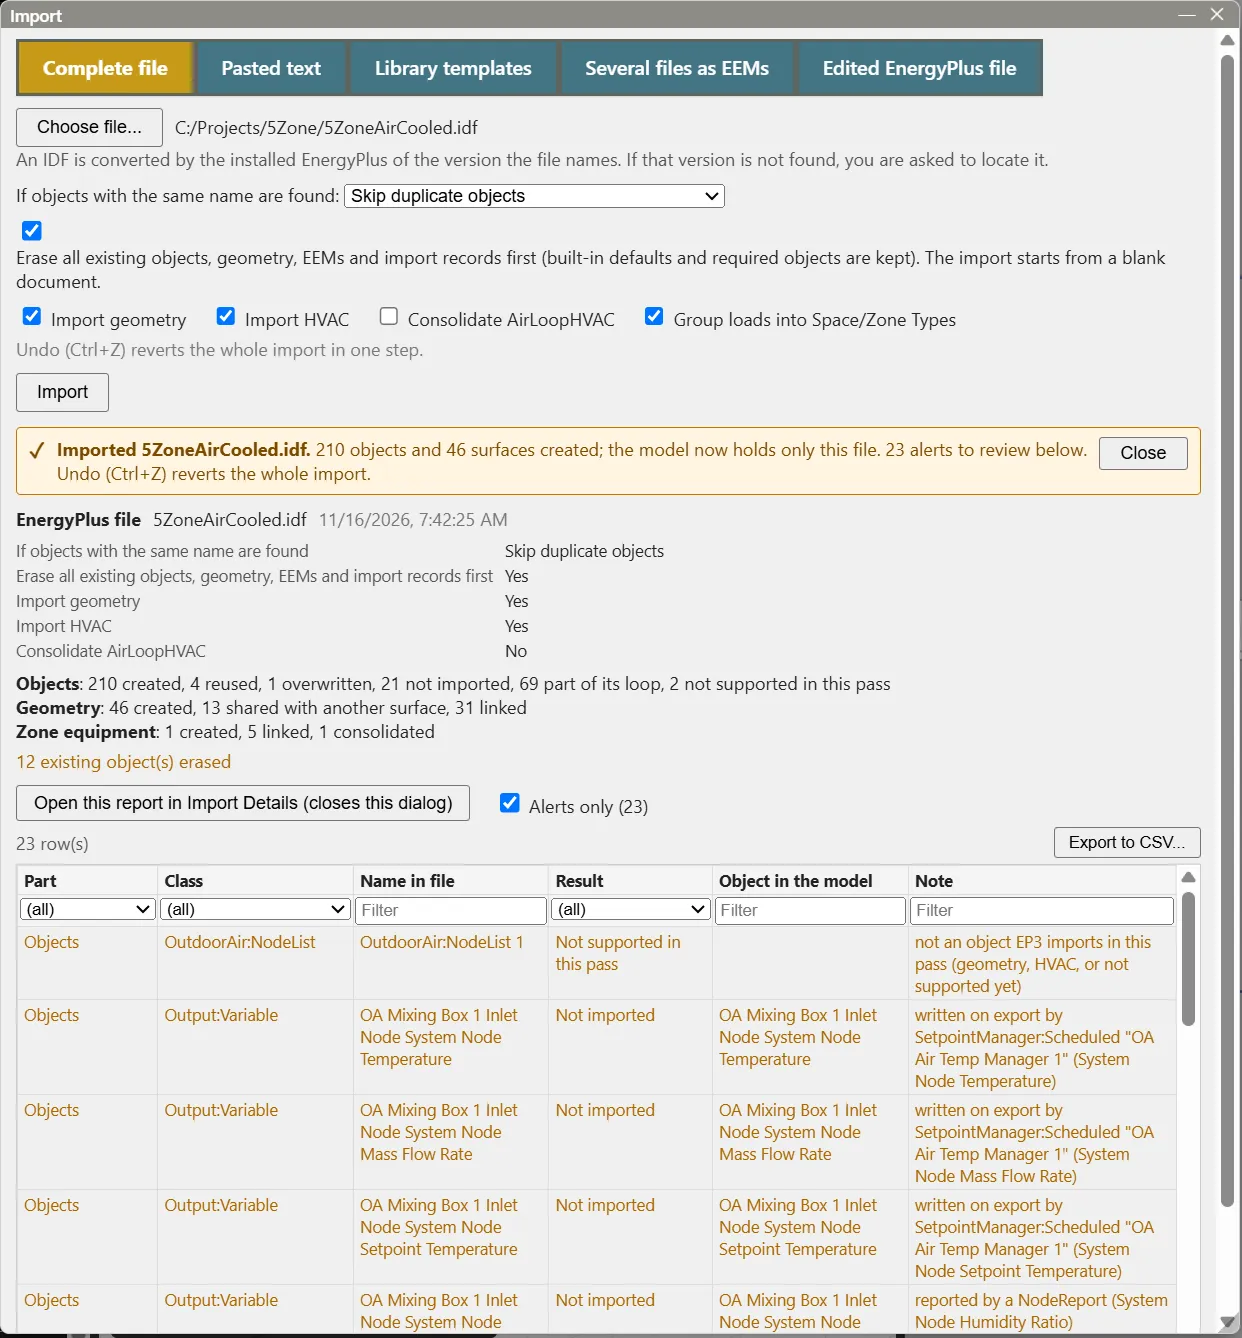
Most alerts in this file are Output:Variable objects that EP3 writes at export (the note names the setpoint manager or node report that writes them), and an OutdoorAir:NodeList, which EP3 does not import. They need no action. Export to CSV… saves the rows the filters show, and Model Settings > Import Details keeps the report with the model.
- Click Close.
Note: Undo (Ctrl+Z) reverses the whole import in one step.
Look at the model and edit something
The outliner shows two floors: Floor 0 with the five zones SPACE1-1 to SPACE5-1, and Floor 2.4 with PLENUM-1. The HVAC outliner on the right lists one VAV Reheat terminal that serves all five zones (the file’s five terminals were consolidated into one), the Chilled Water Loop with Central Chiller, and the Hot Water Loop with Central Boiler.
Suppose the existing chiller is rated at a coefficient of performance (COP) of 3.5 rather than the 3.2 in the example file.
- In the HVAC outliner, click Central Chiller.
- Click Edit input fields for selected object(s) in the top toolbar.
- Set Nominal COP (W/W) to 3.5 and press Enter.
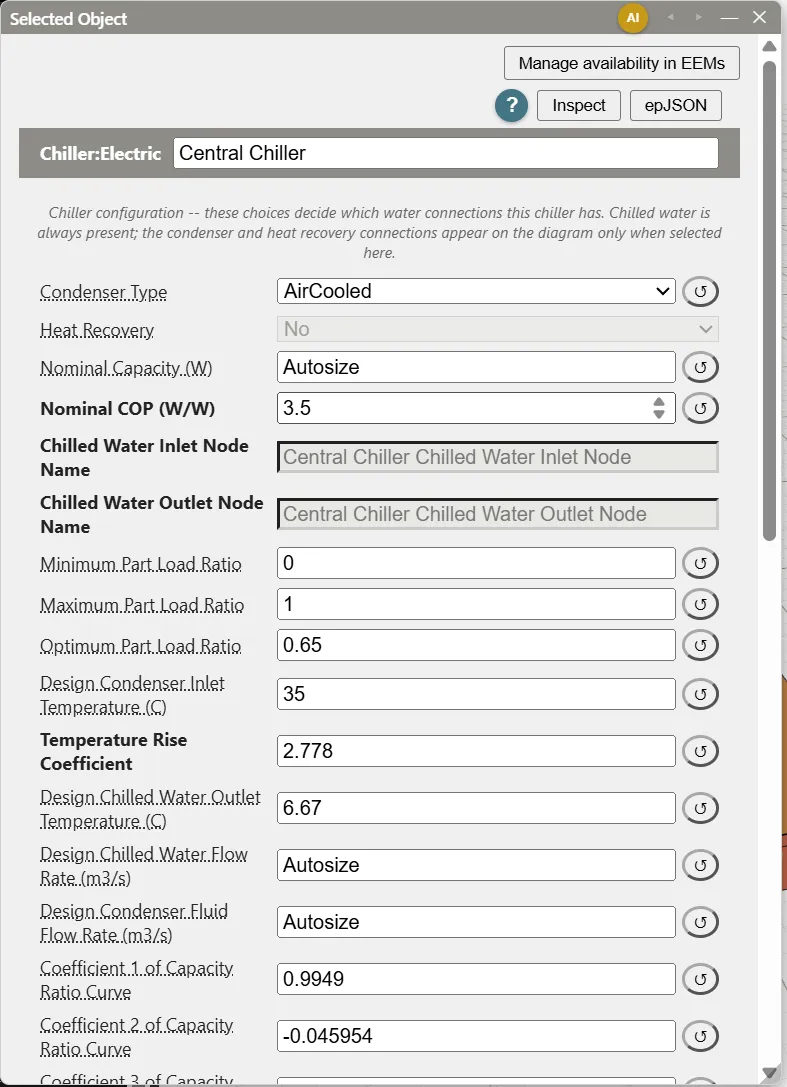
The EEM box in the top toolbar reads Global, so the change is part of the base model.
Add two EEMs
An EEM stores only what it changes. Two measures fit this model: a more efficient chiller and a more efficient boiler.
- Click Edit input fields for objects with no physical representation in the top toolbar.
- In Column 1, under Model Settings, choose Model Alternatives (EEMs).
- Click Add Object twice. Rename the new EEMs High-Efficiency Chiller and High-Efficiency Boiler: type each name in the name box at the top of the EEM’s page and press Enter.
- Close the dialog. Choose High-Efficiency Chiller in the EEM box, click Central Chiller and set Nominal COP (W/W) to 5.
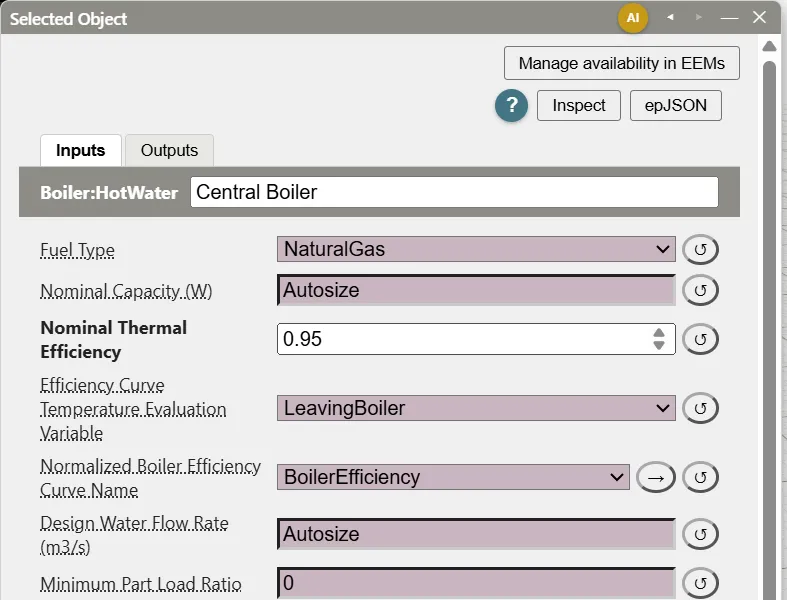
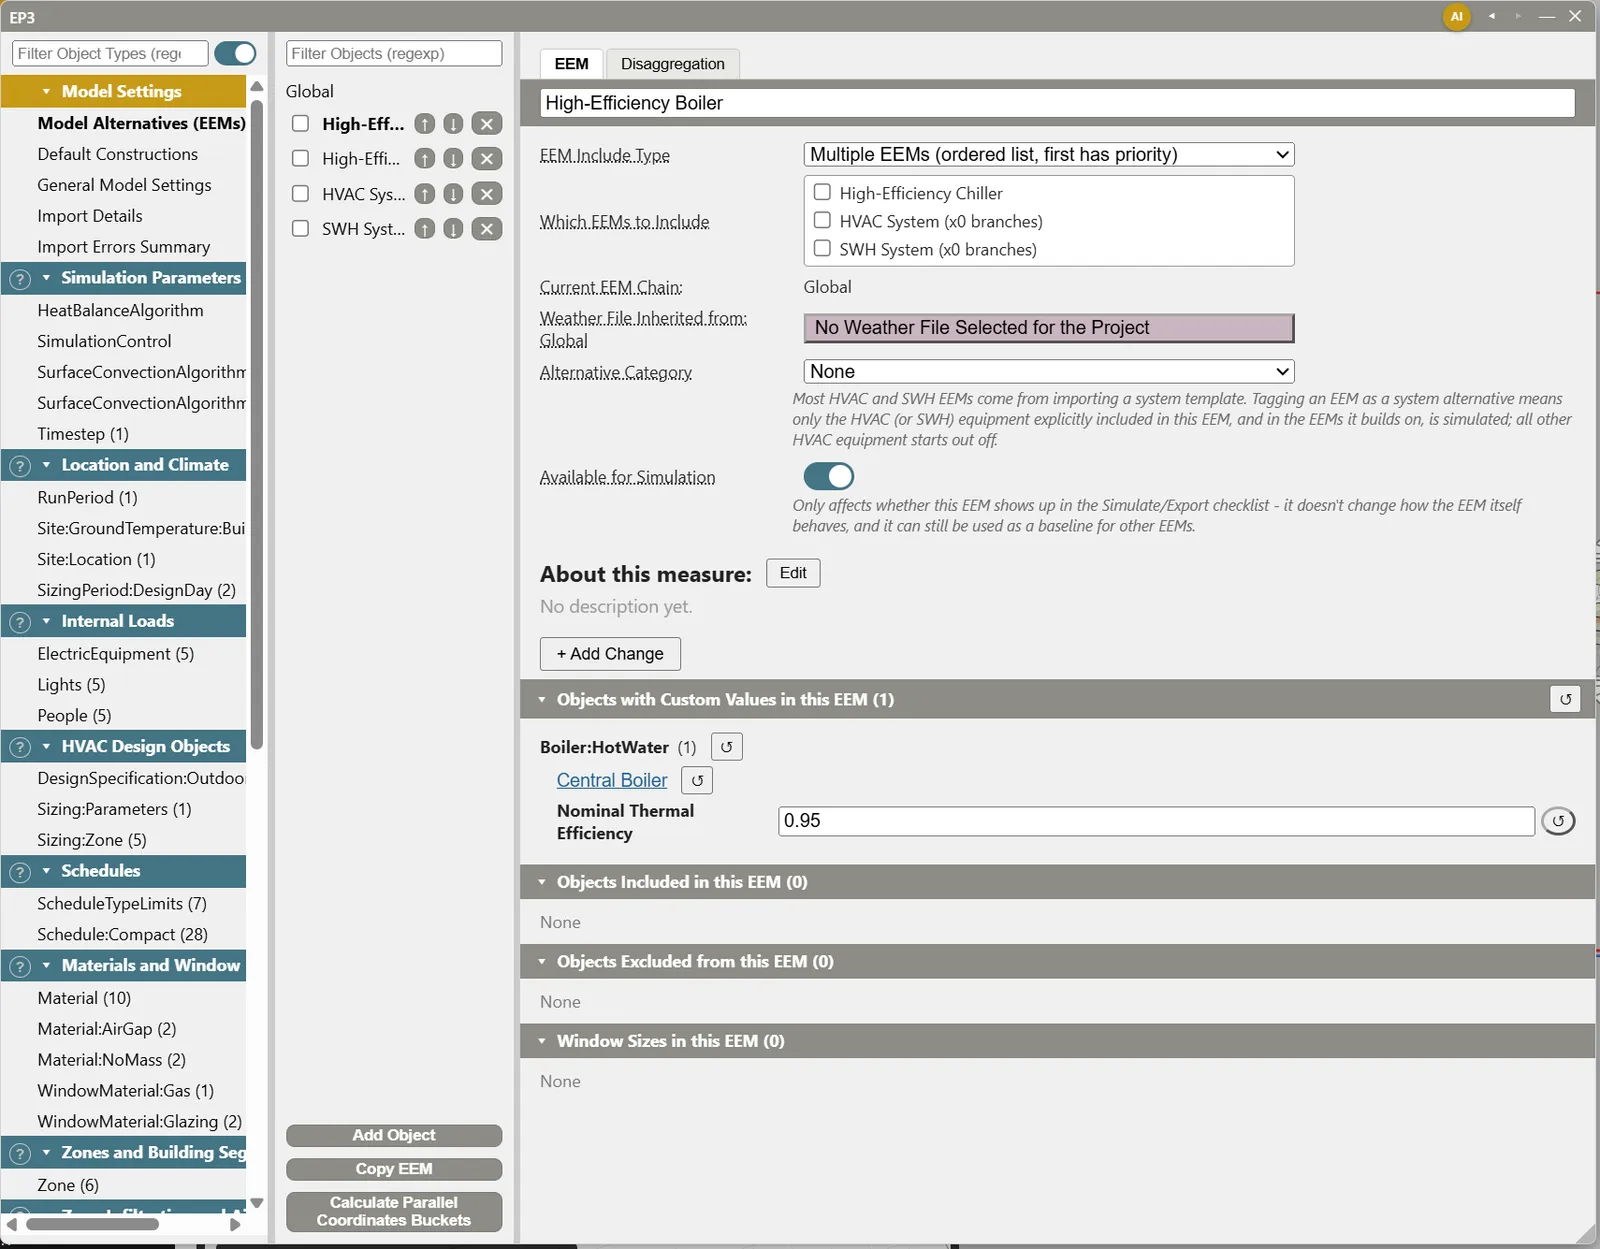
- Choose High-Efficiency Boiler in the EEM box, click Central Boiler and set Nominal Thermal Efficiency to 0.95.
- Choose Global in the EEM box again.
Each EEM’s page lists its changes under Objects with Custom Values in this EEM: one value, and nothing it inherits.
- Save the model with File > Save as
5ZoneAirCooled.ep3. The exported files are named after the model.
Export one epJSON file per EEM
- Click Simulate in the top toolbar to open Simulate / Export.
- Click Select All. The list shows Global, High-Efficiency Chiller and High-Efficiency Boiler.
- Click Export Only and choose an empty folder,
C:\Projects\5Zone\exporthere.
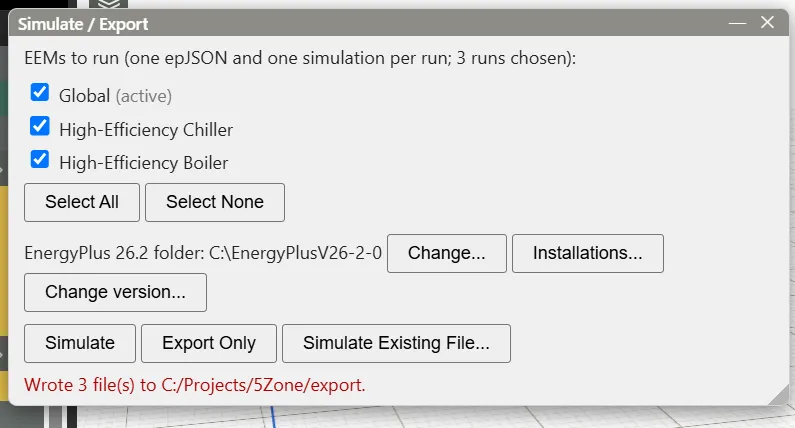
The folder holds one epJSON file per EEM, named after the model and the EEM:
5ZoneAirCooled.epJSON5ZoneAirCooled_High-Efficiency Chiller.epJSON5ZoneAirCooled_High-Efficiency Boiler.epJSON
Each .ep3run.json file beside them is EP3’s record of the run. File > Export epJSON… writes the same files without opening the Simulate dialog.
Note: Export Only needs neither a weather file nor EnergyPlus. Simulate runs EnergyPlus on every ticked EEM.
Zip the files into one model
Several files as EEMs turns a folder of variants of one building into one model with one EEM per file. Use it to turn files from other EnergyPlus tools, or the cases of a parametric run, into a single model.
- Choose File > New and close the Model Wizard with Skip - detailed mode. Zipping into a new, empty file keeps the model you saved untouched.
- Click Import, then the Several files as EEMs tab.
- Click Choose folder… and pick the export folder.
- Click Select All. The table lists the three files.
- EP3 proposes
5ZoneAirCooled.epJSONas the Root, which supplies Global’s values, and builds the other two on it. Under EEM name, type High-Efficiency Boiler, High-Efficiency Chiller and Existing Plant. - Click the arrow under Changes from the root to see what each file changes: one object, and the field with its value in the root and in the file.
- Leave Erase all existing objects, geometry and EEMs first and Then group loads into Space/Zone Types ticked.
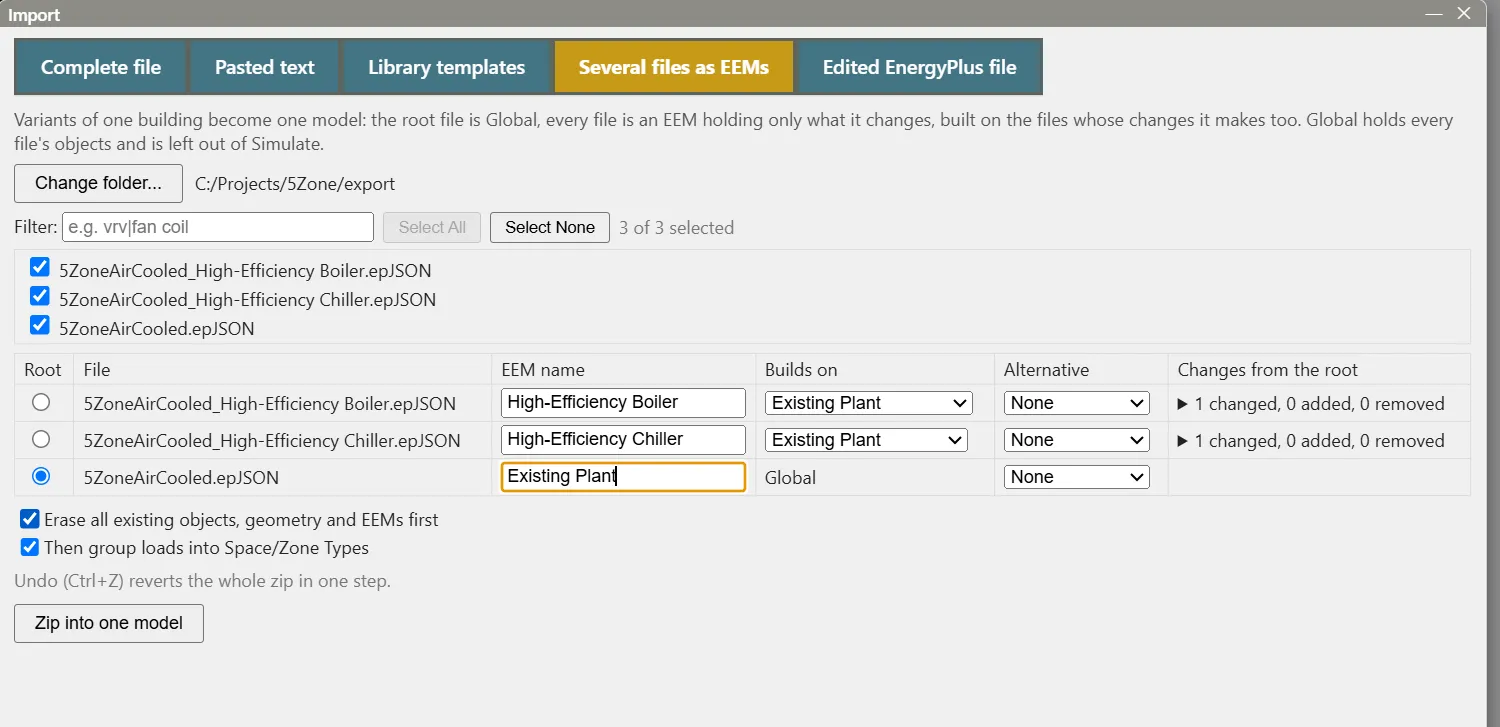
- Click Zip into one model.
With Then group loads into Space/Zone Types ticked, the Combine loads into Space and Zone Types dialog opens over the model once the files are zipped. It compares the loads in every EEM and proposes a Space Type and a Zone Type for them.
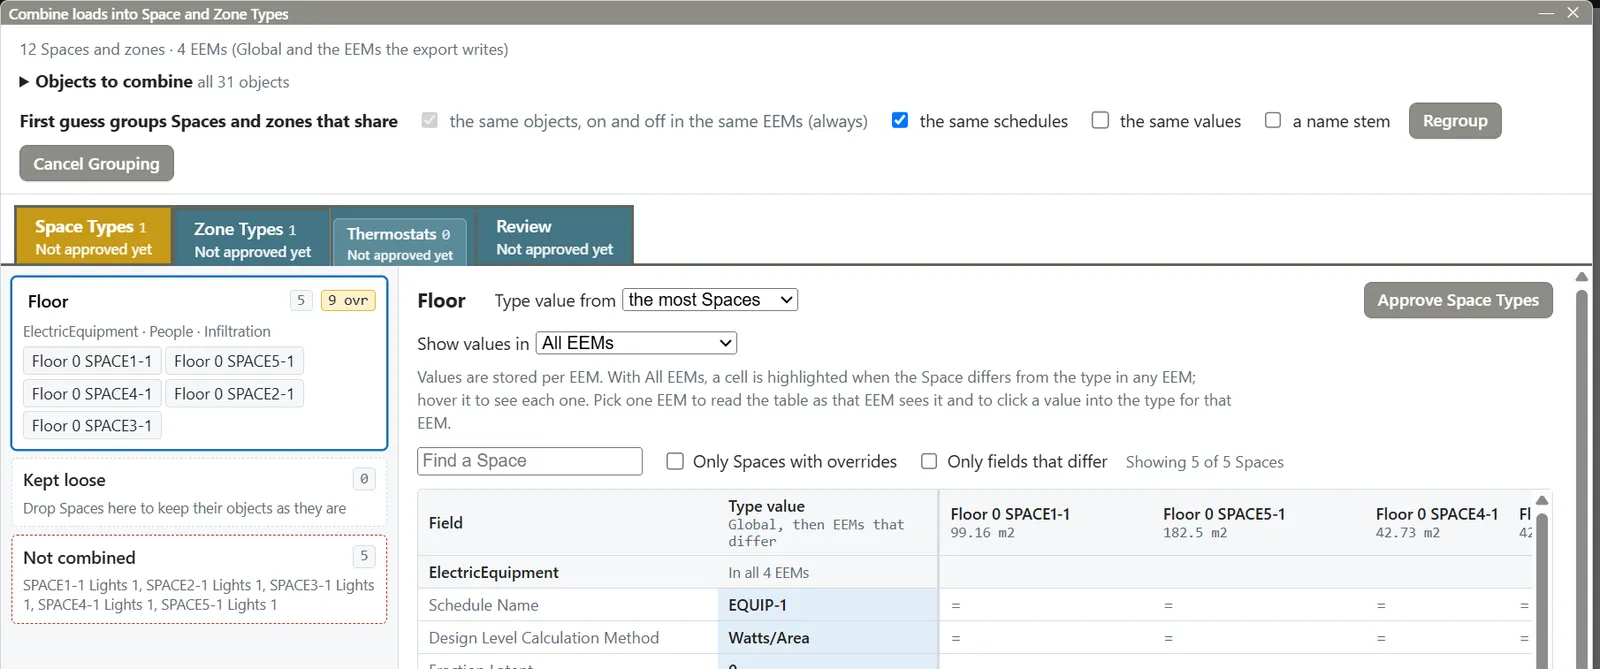
- Click Cancel Grouping to keep the loads as they are.
A line at the top of the result names the root file and the EEMs created. The table lists each EEM, the EEM it builds on and the number of values it stores.
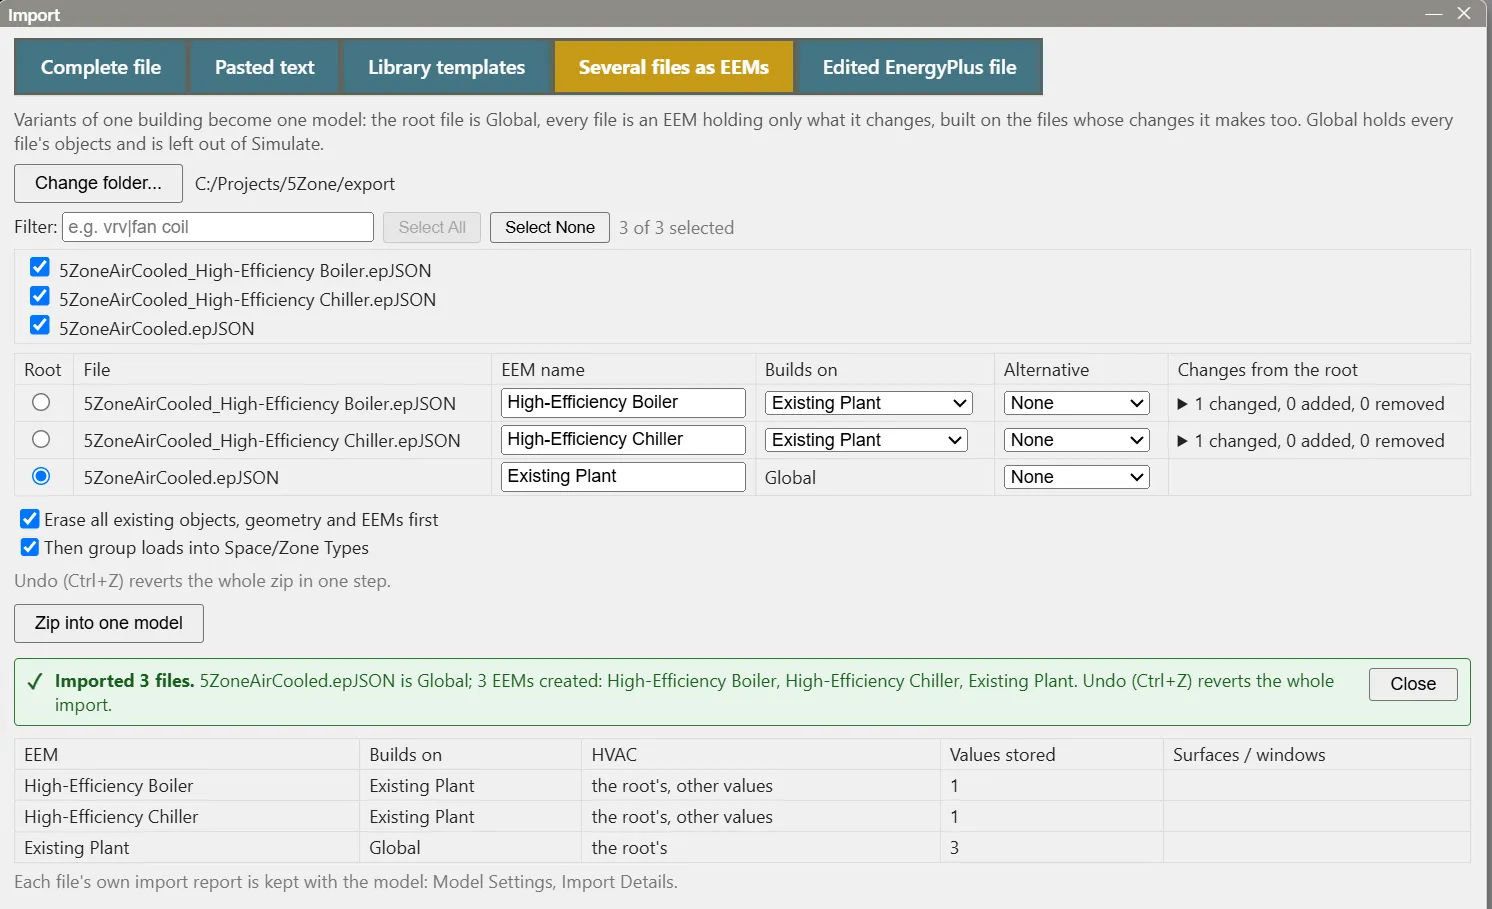
Note: Global holds every file’s objects and is left out of Simulate. The EEMs are the whole-building alternatives.
Zipping rebuilds the geometry from the files, so the zipped model’s Spaces are named Floor 0 SPACE1-1 instead of SPACE1-1, and some surface names differ from the first model. Save it as 5ZoneAirCooled-zipped.ep3 if you want to keep it. The next part merges an edited file back into 5ZoneAirCooled.ep3, the model that exported it.
Change an exported file in a text editor
Suppose the chiller manufacturer’s submittal gives a COP of 5.6 at a leaving chilled water temperature of 7 °C.
- Open
5ZoneAirCooled_High-Efficiency Chiller.epJSONin your text editor. - Search for
Chiller:Electric. The object looks like this:
"Chiller:Electric": {
    "Central Chiller": {
        "condenser_type": "AirCooled",
        "nominal_capacity": "Autosize",
        "nominal_cop": 5,
        ...
"design_chilled_water_outlet_temperature": 6.67,- Change
"nominal_cop": 5to"nominal_cop": 5.6and"design_chilled_water_outlet_temperature": 6.67to7. - Save the file as epJSON, in the same folder.
Important: Merging back brings in changed values and added or removed objects. Geometry changes, such as moved vertices, are not merged back.
Merge the change back
- In EP3, open
5ZoneAirCooled.ep3with File > Open, click Import and choose the Edited EnergyPlus file tab. - Click Choose file… and pick the edited
5ZoneAirCooled_High-Efficiency Chiller.epJSON. - Next to Exported from:, choose High-Efficiency Chiller. EP3 proposes the EEM the file differs from least, which can be Global when two EEMs tie, so check it. The line beside it counts the objects changed, added and removed: 1 changed, 0 added, 0 removed.
- Choose A new EEM, name it Chiller Submittal Data and set built on to High-Efficiency Chiller.
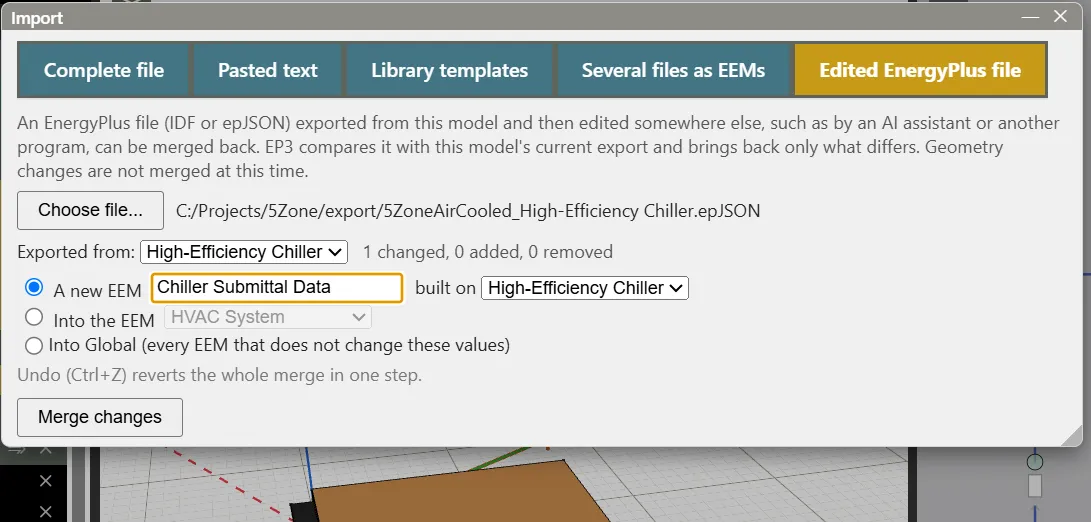
- Click Merge changes.
A green line confirms the merge.
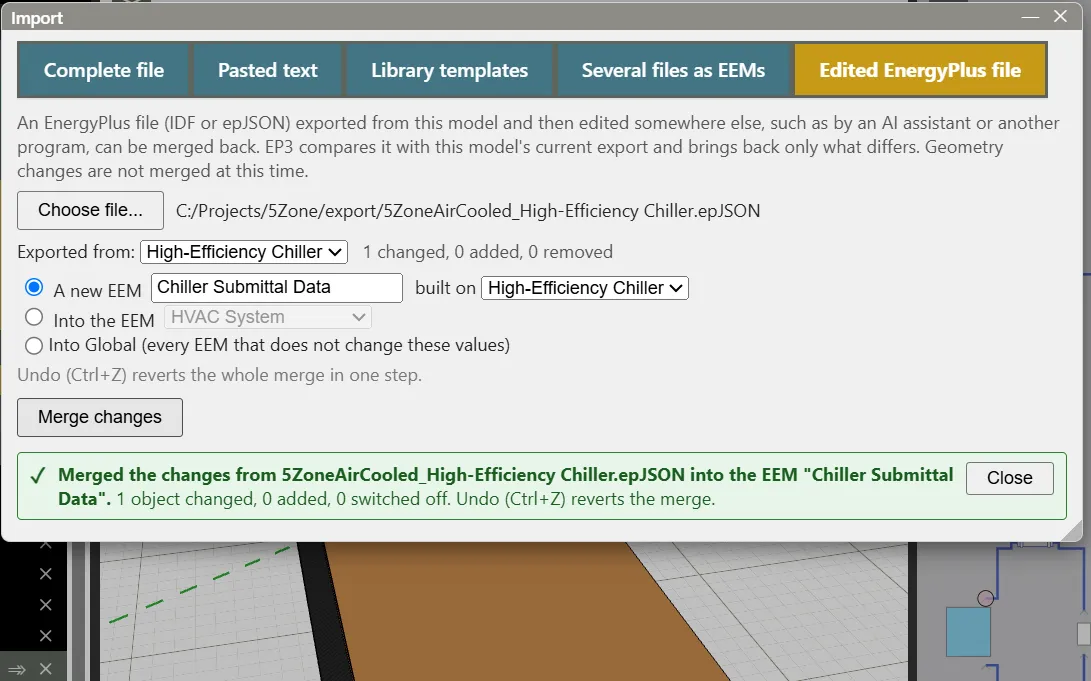
Tip: Into the EEM writes the edit into an existing EEM, and Into Global (every EEM that does not change these values) changes the base model. Ctrl+Z reverts either. The line is amber when some edits could not come back; those are listed under Not brought back.
Check what changed
- Click Close.
- Click Edit input fields for objects with no physical representation in the top toolbar.
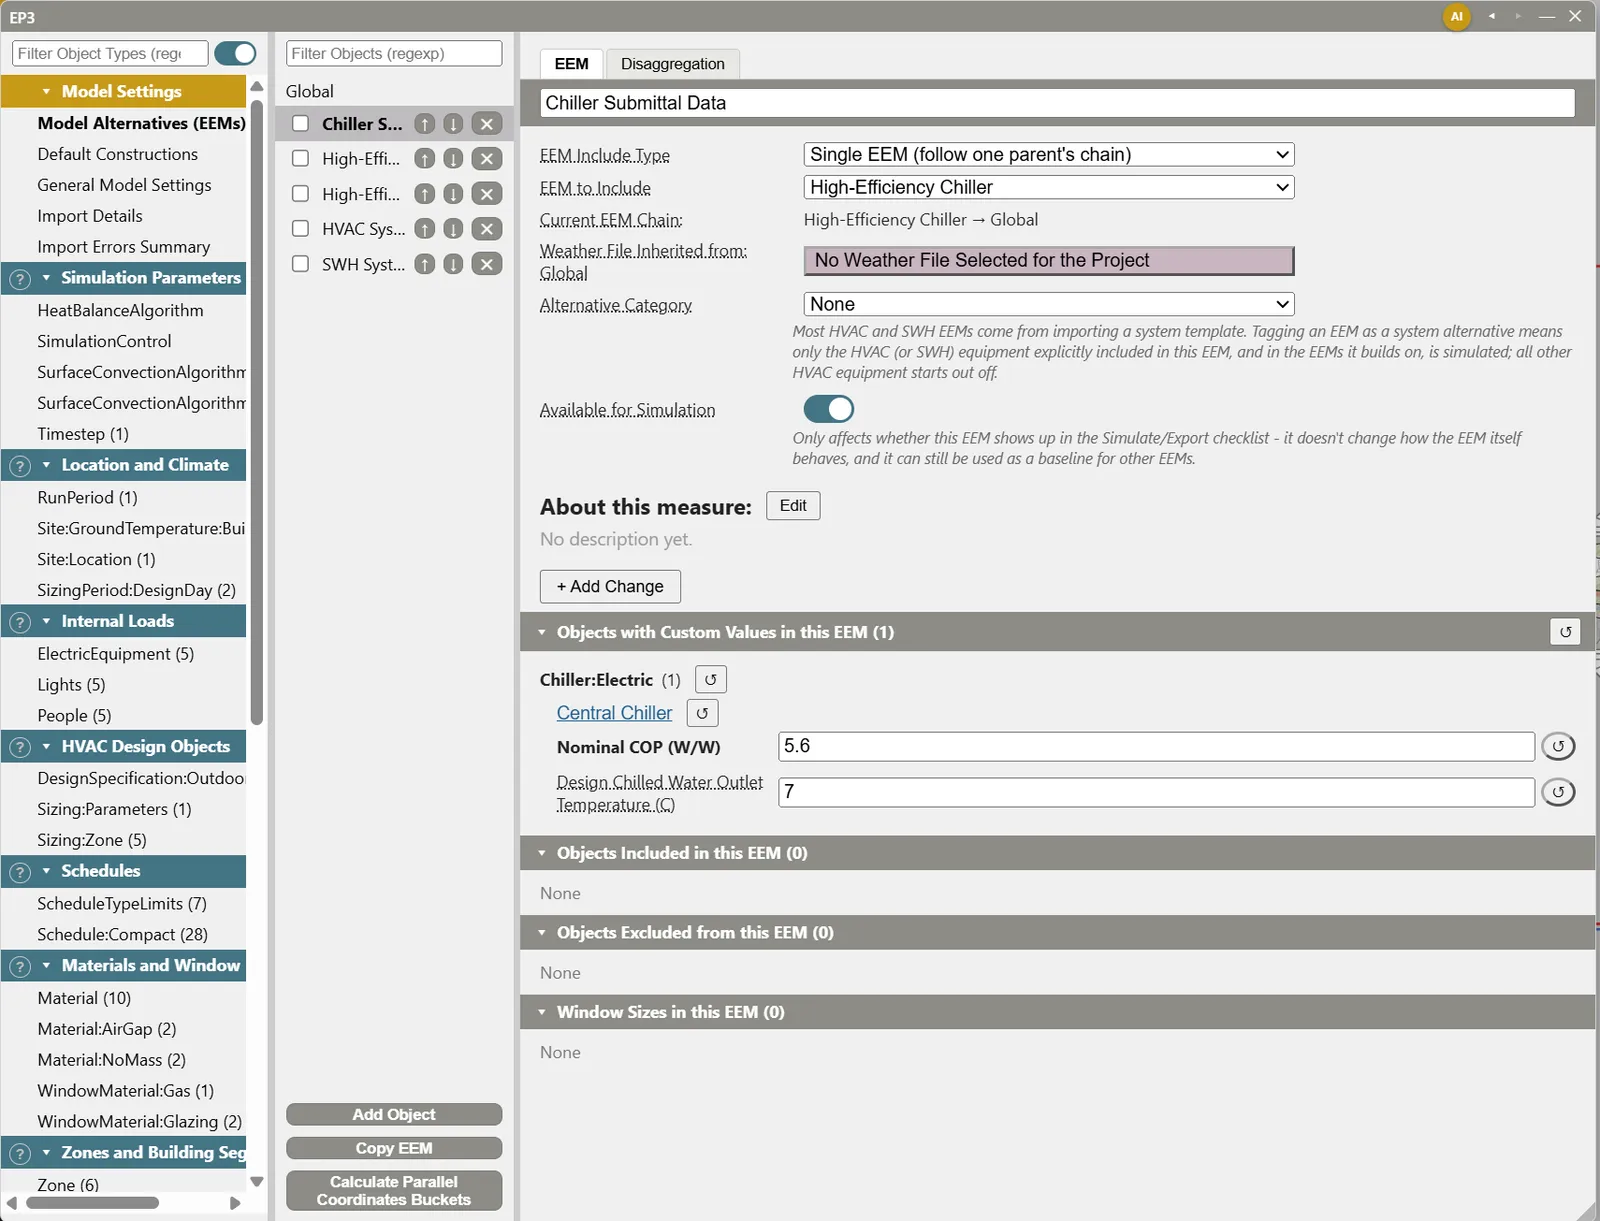
- Choose Model Alternatives (EEMs), then click Chiller Submittal Data.
The EEM’s page lists the two values the edit set, and nothing else: Nominal COP (W/W) 5.6 and Design Chilled Water Outlet Temperature (C) 7. Current EEM Chain reads High-Efficiency Chiller → Global, so everything else comes from the chiller EEM and from Global.
- Choose a weather file in General Model Settings.
- Click Simulate and tick Chiller Submittal Data to run it beside the other EEMs.
Next steps
- Importing EnergyPlus Files covers pasted text,
.ep3files, the same-name options and what is not imported. - Energy Efficiency Measures (EEMs) covers EEMs built on each other, branching EEMs and disaggregation.
- Running Simulations covers the Simulate / Export dialog and where each run’s files go.
- EnergyPlus Versions covers files from other EnergyPlus versions.